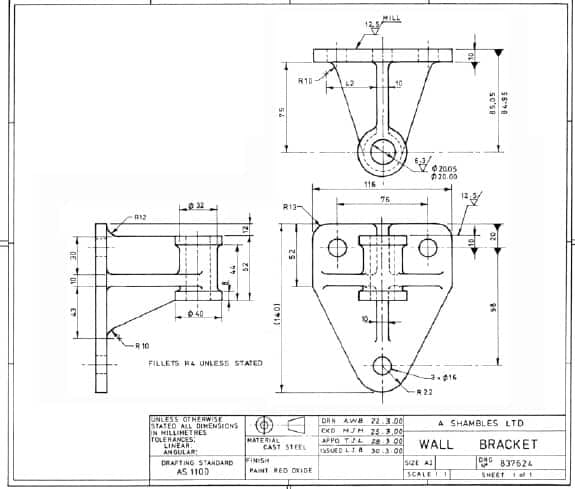
Technical Drawing Interpretation

Technical Drawing Interpretation

$ 599

Course Length:
8 hours 4 sessions, 2 hours per session

Format:
Instructor Led Remote Training two-hour sessions

Course Objective:

Upon completion of this course, the participant will be able to:

  • Define the Alphabet of Lines
  • Understand Orthographic Projection
  • Calculate Tolerances and Missing Dimensions
  • Understand Symbols and Drawing Conventions
  • Understand Southco Engineering Drawings

Course Content;

I. Introduction to Technical Drawings

  1. Terminology and Symbols
  2. Lines
  3. Cutting Plane and Section
  4. Thread Representation
  5. Title Block
  6. General Tolerances
  7. Types of Tolerances
  8. Revisions


II. Orthographic Projection

  1. First and Third Angle
  2. One View
  3. Two View
  4. Three View
  5. Primary Auxiliary View
  6. Secondary Auxiliary View
  7. Viewing Plane


III. Section Views

  1. Concept
  2. Cutting Plane
  3. Section View (Full, Half)
  4. Revolved Section View
  5. Rotated Section View
  6. Partial Section View


IV. Dimensioning and Tolerancing

  1. General Tolerances
  2. Dimensional Tolerances
  3. Unilateral, Bilateral, Limit
  4. Size Dimension Techniques
  5. Location Dimension Techniques


V. Dimensioning Concepts

  1. Holes and Hole Patterns
  2. Counterbores and Countersinks
  3. Surface Finish
  4. Fasteners and Threads (Inch and Metric)

Description

Course Content;

I. Introduction to Technical Drawings

  1. Terminology and Symbols
  2. Lines
  3. Cutting Plane and Section
  4. Thread Representation
  5. Title Block
  6. General Tolerances
  7. Types of Tolerances
  8. Revisions


II. Orthographic Projection

  1. First and Third Angle
  2. One View
  3. Two View
  4. Three View
  5. Primary Auxiliary View
  6. Secondary Auxiliary View
  7. Viewing Plane


III. Section Views

  1. Concept
  2. Cutting Plane
  3. Section View (Full, Half)
  4. Revolved Section View
  5. Rotated Section View
  6. Partial Section View


IV. Dimensioning and Tolerancing

  1. General Tolerances
  2. Dimensional Tolerances
  3. Unilateral, Bilateral, Limit
  4. Size Dimension Techniques
  5. Location Dimension Techniques


V. Dimensioning Concepts

  1. Holes and Hole Patterns
  2. Counterbores and Countersinks
  3. Surface Finish
  4. Fasteners and Threads (Inch and Metric)

Additional information

Months

September, October, November, December

Instructor Info

WALT PRYSTAJ

Training and Consulting since 1990 Trained in more than 250 companies across North America, and internationally, with clients ranging from large corporations to small businesses, including manufacturing companies and service providers (partial list):

  • Allison Gas Turbine
  • General Motors Corp.
  • American Axle & Mfg.
  • Philips Lighting
  • Central Foundry
  • Saturn Motor Corp.
  • Flint Engine
  • Delphi Corporation
  • United States Government
  • Eastman Kodak Company
  • Xerox Corporation
  • Gleasons
  • RIT
  • MCC
  • FLCC
  • GCC


Background:

  • Owner of Pace-a-tronics – tool and die company and CNC Manufacturing
  • Plant Manager of Trimatek – manufacturer of precision brake system components
  • PEN Associates, LLC Owner Director (Training and Consulting Firm)
  • Adjunct Instructor at Rochester Institute of Technology, Monroe Community College,


Education / Certifications:

  • B.S from State University of New York at Oswego
  • Graduate work at Rochester Institute of Technology
  • Tool and Die Apprenticeship at Eastman Kodak Company
  • Geometric Dimensioning and Tolerancing
  • Quality Management Systems Expert, certifying more than 70 companies to… ISO 9001, IATF16949, AS9100


Course Expertise:

  • Geometric Dimensioning and Tolerancing
  • All aspects of CNC Machining
  • All aspect of Lean Manufacturing
  • TPM
  • Management by Metrics
  • ISO 9001, AS9100, IATF 16949, ISO 14001, ISO13485
  • Blueprint, Mathematics, Metrology

Reviews

There are no reviews yet.

Be the first to review “Technical Drawing Interpretation”

Your email address will not be published. Required fields are marked *

Enroll our

Technical Drawing Interpretation

0
    0
    Your Cart
    Your cart is emptyReturn to Courses